I've been sketching exclusively with an iPad for the last year and a half. I've also conducted a few workshops on the subject now (just did one for an Apple Store last Friday), and been asked many, many times about the equipment I use. While I have written about some items before, I thought I'd do a post that summarizes my top-recommended gear and accessories for easy reference.
The core of the Ultimate Mobile Digital Sketching Studio: An iPad and the app, Procreate
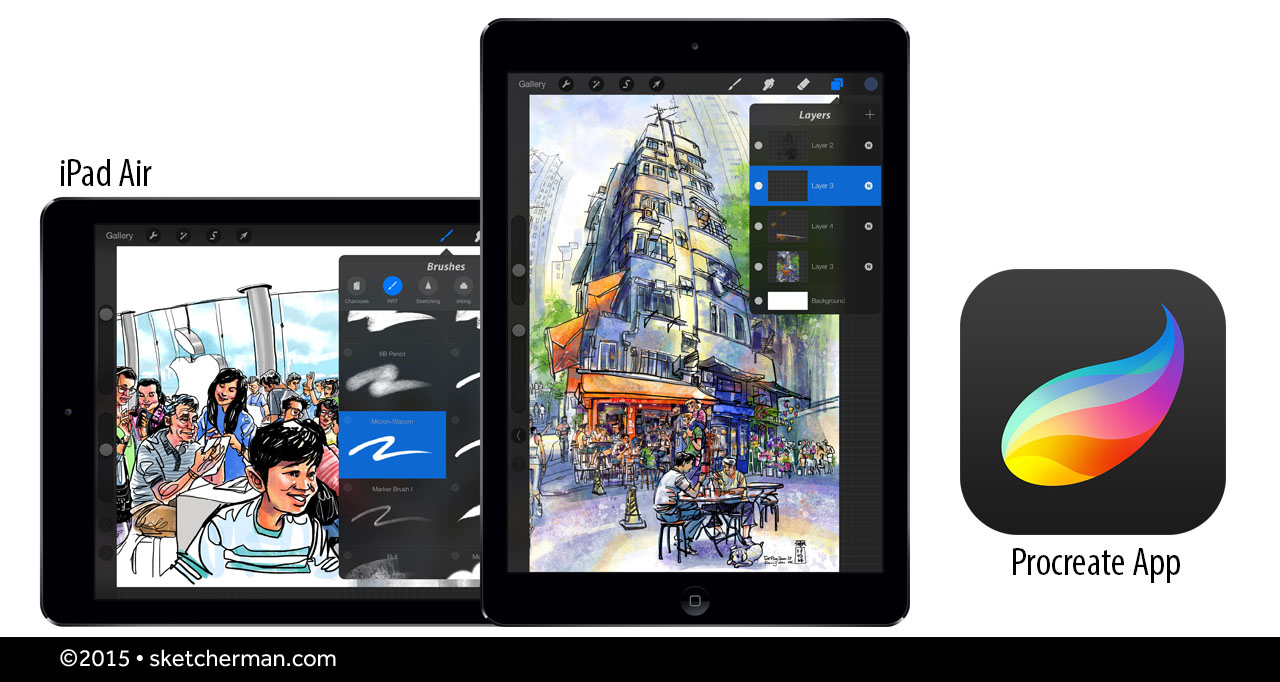
iPad
I'm still using the original iPad Air and love it. The iPad Air 2 was released in October 2014, and is even lighter, and more powerful. If you're serious about sketching on the iPad, I'd suggest you get the latest model, with the largest capacity you can afford (Tip: don't buy 16GB iPads - you'll be wasting a ton of time trying to manage space). This will future-proof you for at least 2-3 years.
If you have an older iPad and wonder whether you'll still be able to use it, the oldest you can use with a good pressure-sensitive stylus is the 3rd generation iPad, released in 2012. Apple started using Bluetooth 4.0 technology then, and this is the standard for all the best styli on the market now.
Guess what the pros use to create? After testing multiple art/sketching apps, I can confidently say that there's nothing like Procreate. Simple yet highly customizable, it stays out of your way while ensuring that all the tools you need are easily accessible in a clean UI.
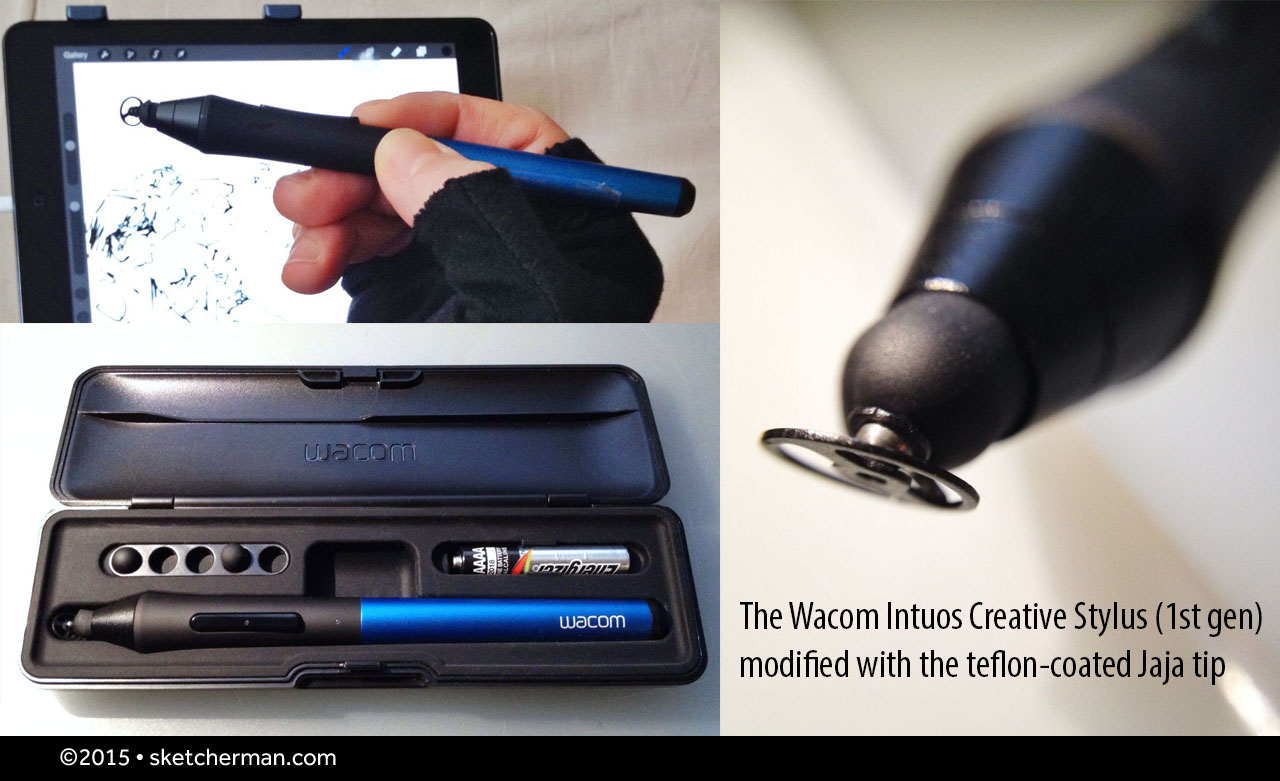
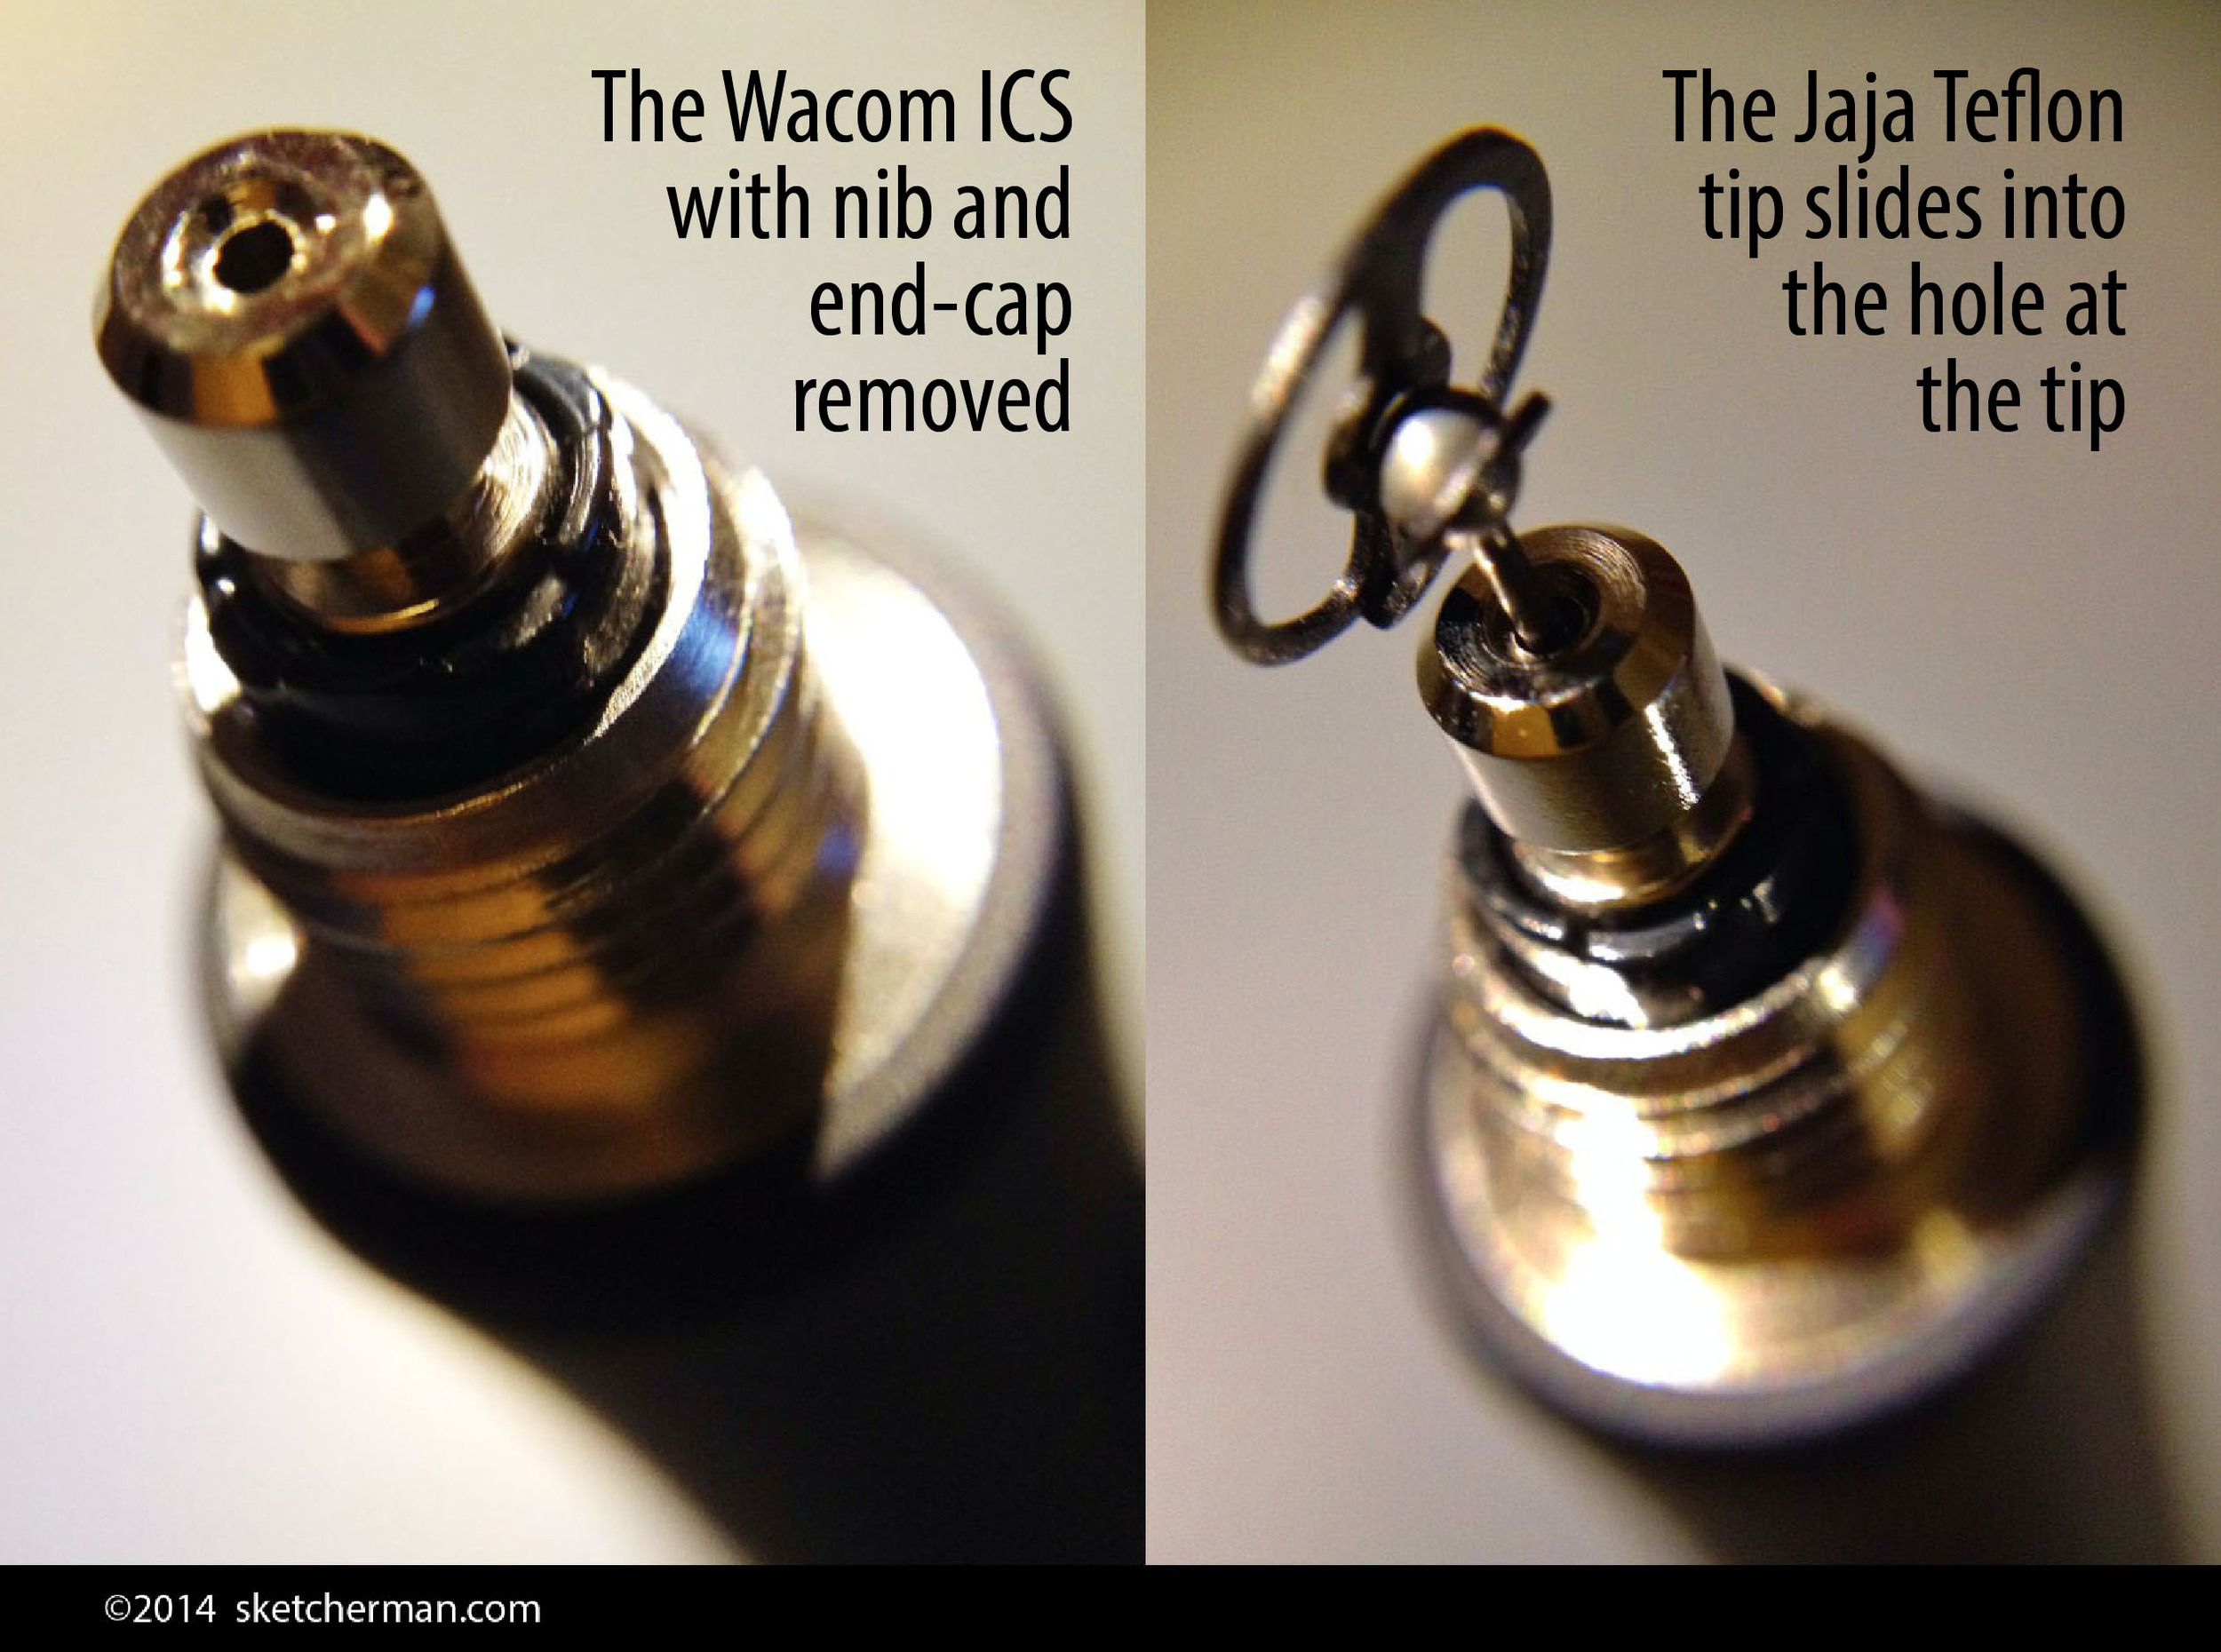
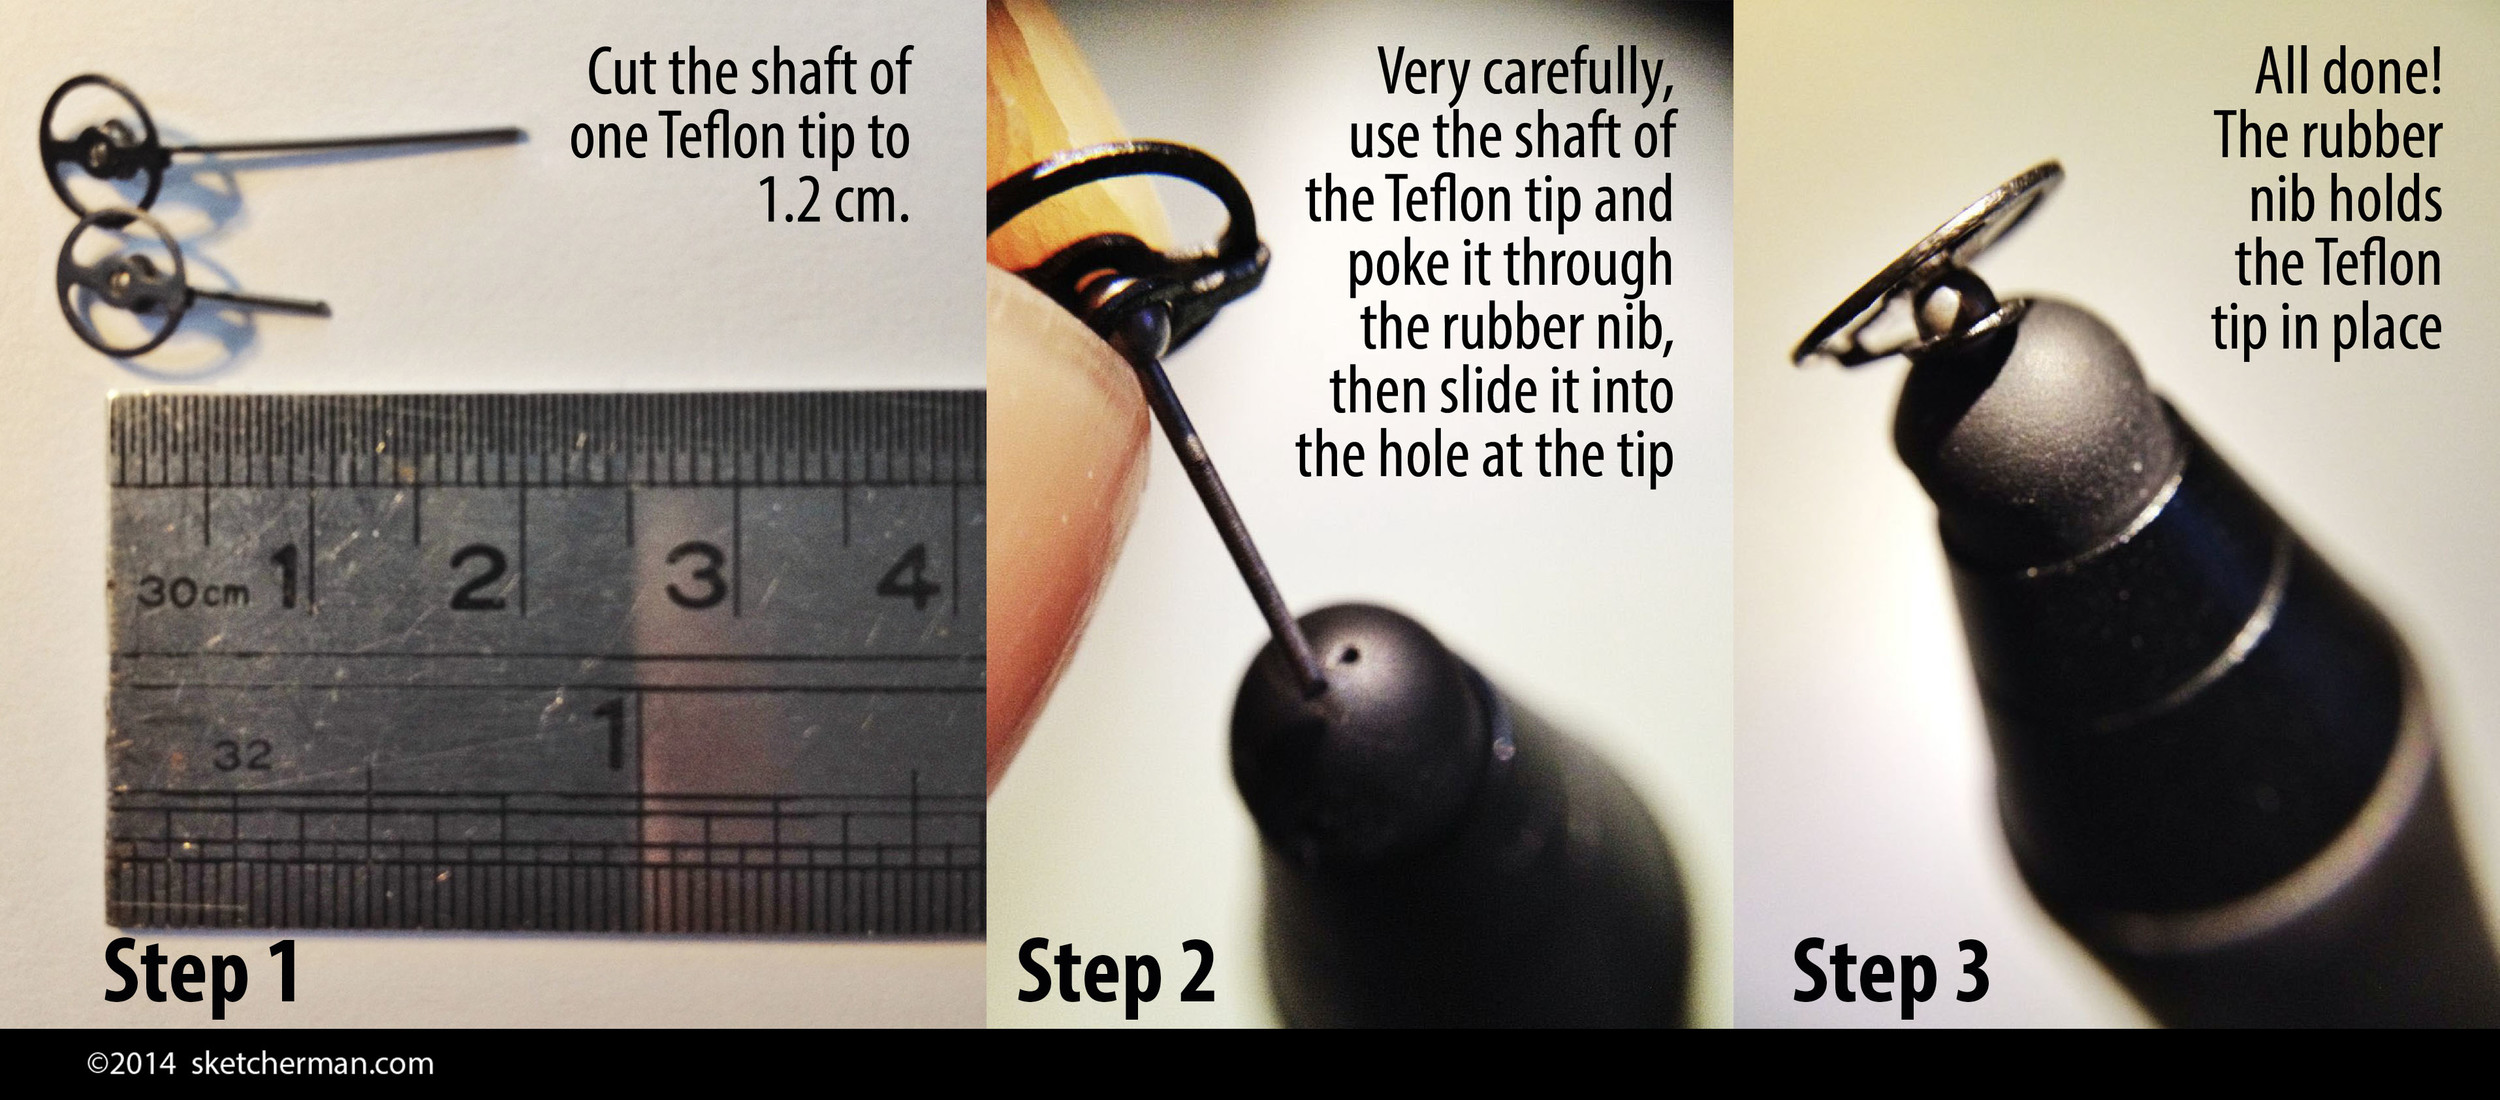
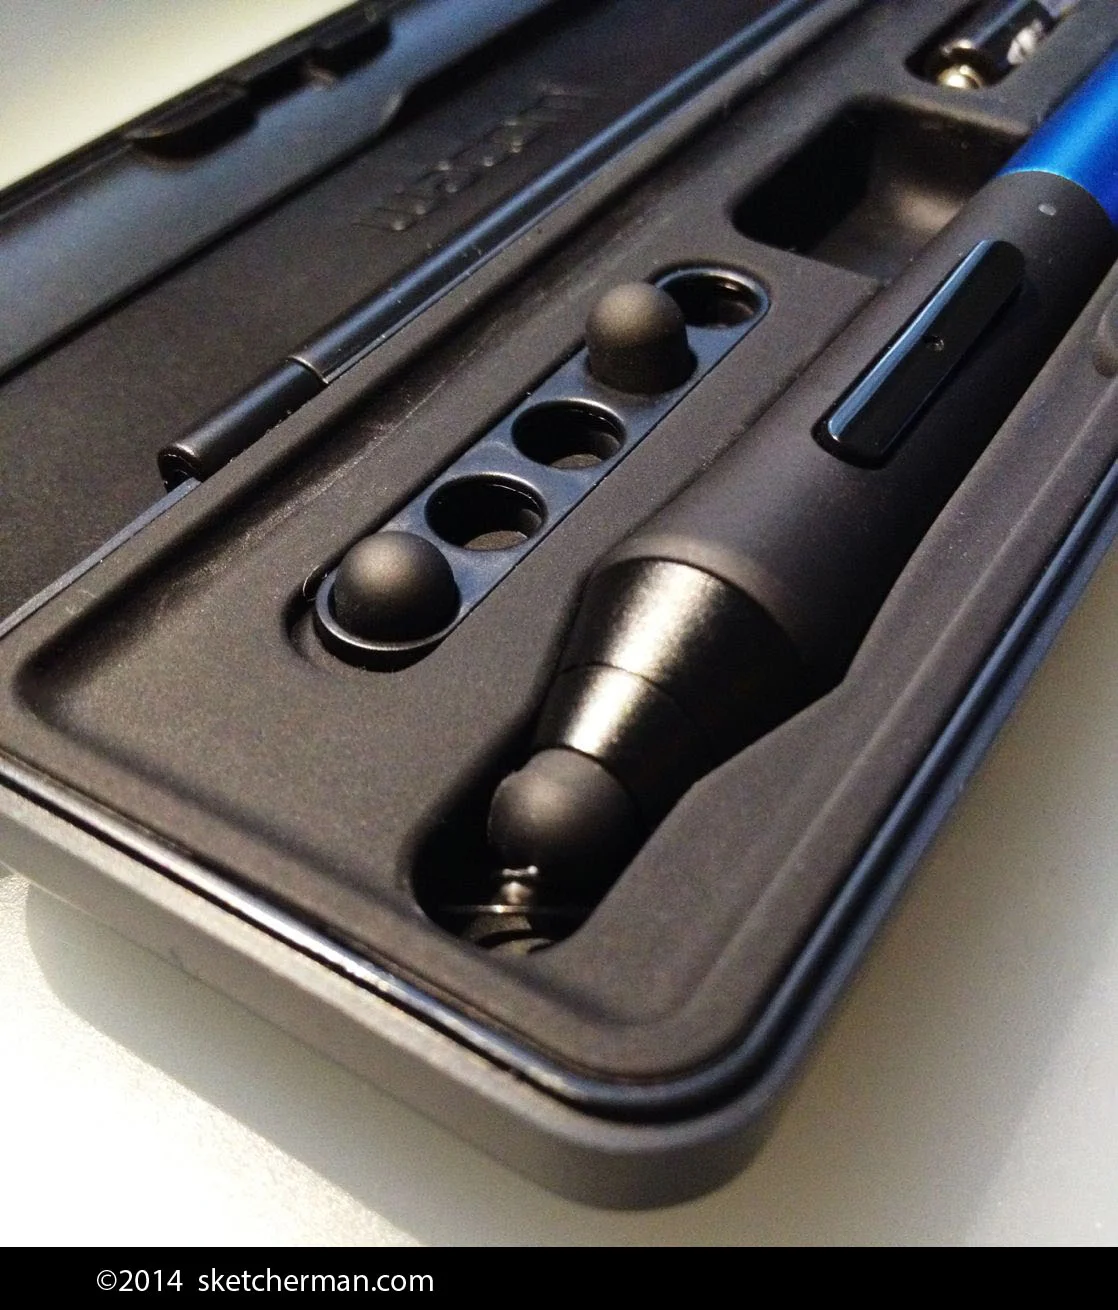
Still my favorite stylus! Remember that the nib is modified though.
Stylus
After testing many (detailed reviews coming in the following weeks), my top favorite is still my old Wacom Intuos Creative Stylus. This is the first generation model, released late 2013. I have tested the 2nd generation model, and unfortunately cannot recommend it until Wacom fixes some of its serious bugs. The good news for you guys is that the old model is now considerably cheaper! The not so great news is that for best results, you should modify it with the Jaja nibs by Hex3 that I listed in my previous post. Fortunately, once you have the tips in hand, the modification is quick and very easy. (You could do it in 15 minutes tops.)
I have also tested the latest Adonit Jot Touch with Pixelpoint (what a mouthful!) and that's what I recommend if you'd like to get a good pressure sensitive stylus without needing to modify anything. This is a new release and is pretty good. Full review coming up in the following weeks.

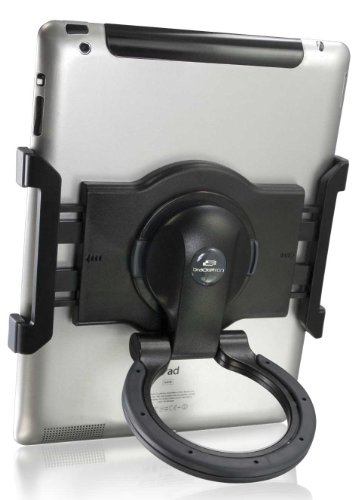
This tablet holder takes sketching on the iPad to a whole new level. Absolute awesomeness!
iPad/Tablet Holder
This one raises eyebrows wherever I go, and after using it every day for hours on end, I can also highly, highly recommend it. The Twist 360 is an extremely versatile universal tablet holder. I love that it can accommodate most larger tablets (sorry, 7" tablets - Kindles, iPad Minis - don't fit, but I'm testing one that does and will post that later). The Twist 360 is a wonder that allows me to hold my iPad in a myriad ways, stand it horizontally or vertically, with any degree of tilt I desire, even hang it. It takes sketching on the iPad to a totally different level and I'm totally dependent on it!
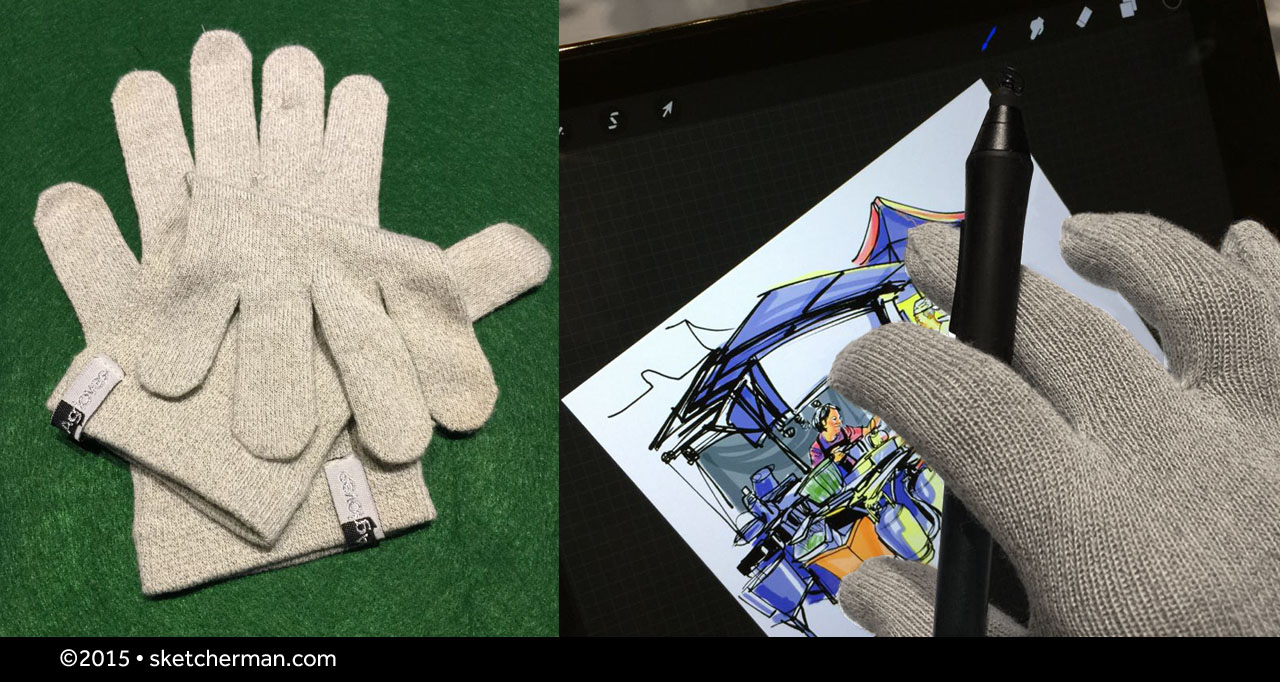
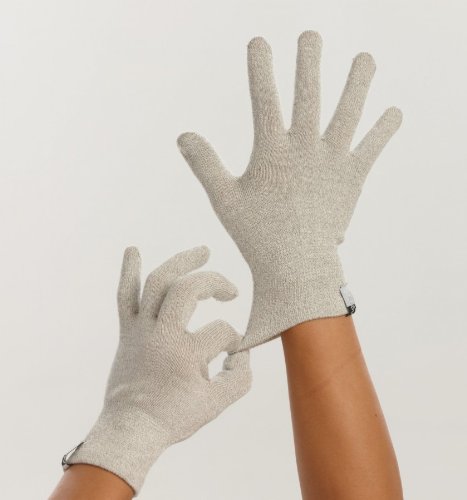
Capacitive Gloves
I have hunted high and low for a pair I like and tested several that I didn't. These gloves from Agloves are awesome. Woven through with conductive silver in bamboo fabric, they're really comfortable and allow me to to use multi-finger gestures on my iPad while serving 2 purposes: keeping my hands warm in cold weather, as well as erasing smudges on the screen! haha! I like that the entire glove is capacitive, not just the tips. These are very light and pretty thin (exactly what I was looking for) and so may not be sufficient for you if your winters are very cold. Agloves has thicker, warmer versions for that.

Great Seating on the Go
I've being doing a lot of urban sketching, and when you're out and about, good, solid, ergonomic seating is paramount. While evaluating my options, I decided that what I purchased had to fulfill 4 important criteria:
- my choice had to be as light as possible
- had to be really well-made and last me at least 10 years
- pack really small
- support my lower back!
Here are my favorite options, ticking all the boxes and working better in slightly different situations. The Helinox One Camp Chair was my first purchase. It's really quick and pretty idiot-proof to set up, and packs to about the size of a sneaker. Weighing in at under 1kg and under 2lbs, I can pick it up with my little finger. This beauty is also so comfortable to sit in, and yet is strong enough to take 350lbs! It leans back a bit, and is probably not for those who like to be very upright. (I do find that slipping a jacket behind me is an easy fix for that when i do want to sit up straighter.) Another plus: the curve of the fabric cups my elbow, thus supporting my arm for the hours I spend outdoors sketching. When it's time to kick back, have a drink and swap sketching stories under the trees, wow- this is the absolute best chair to stretch out and relax in!
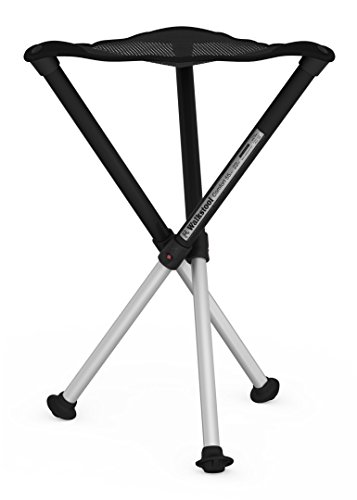
The Helinox One has a larger footprint and takes about 20-30 seconds to set up however. When I know that I won't have much space (think museum interiors and narrow sidewalks) and want almost instant setup and takedown, my seating of choice is the Walkstool 55 XL. It comes with its own handy mesh bag that you can sling over a shoulder. I really wanted something that would fit into any of my backpacks, however. Telescoped, it's a compact 14" long, and love that this stool can be used at 2 lengths: short and fully extended. There are several sizes, so you can pick one that suits your build. The seat is large and comfy, and I was delighted to find that (in addition to lightning fast setup) I automatically sit up straight when I use it. Slouching takes effort when I'm on it, so my posture instantly improves!
Neither of the 2 seating options is particularly cheap, but pick any up and you'll feel instantly that they're built to last. I've used a lot of bargain basement clunkers that were either bad for the back or heavy as hell. Truly, you get what you pay for, and as sketching outdoors is something I do so much, I realized I should just invest in solid, dependable options. These are light, strong, very durable and ergonomic to boot! I figured if I got 10 years out of them, these would each only cost me about $10 a year. When you look at it like that, they're no brainers, really.
Do you have other equipment to recommend? I'm always on the lookout for gear that improves my on location sketching experience. Please add your suggestions in the comments! :)